Setting up payment methods
Payment methods are configured in two separate steps in the Merchant Portal, found under the Payment methods menu:
- Configuration: connect a payment provider (PSP) or payment method and set its credentials and behavior.
- Display: choose which of your configured payment methods are actually shown to customers, and how they look and are ordered in the checkout.
A payment method must be added in Configuration before it can be turned on in Display.
Step 1: Connect and configure a payment method
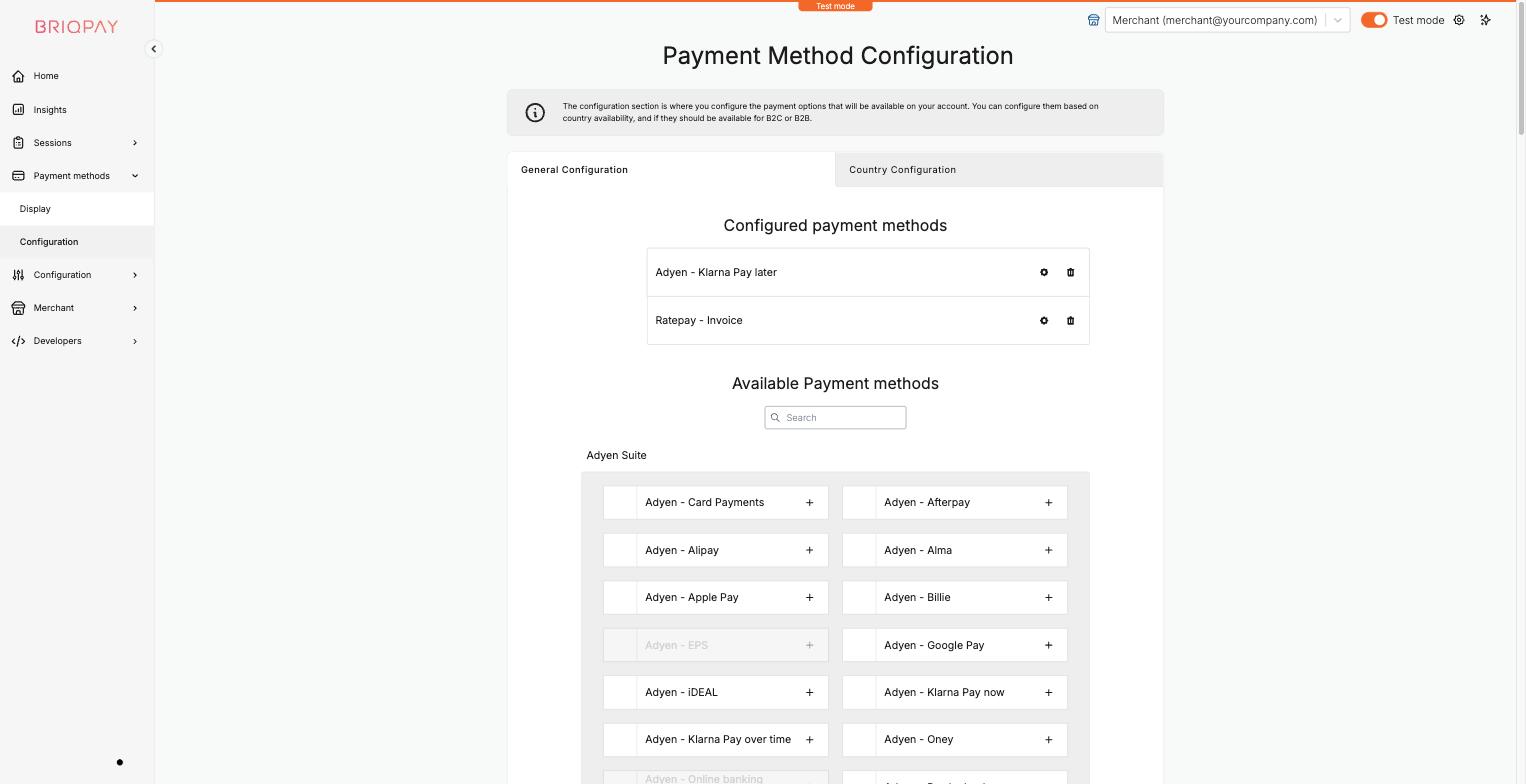
- In the left menu, go to Payment methods > Configuration.
- You will see two tabs:
- General Configuration: settings that apply globally, used for any country you have not separately configured.
- Country Configuration: settings specific to a single selling country, which override the general configuration for that country.
- Under Available Payment methods, use the search box or scroll through the supplier groups (for example Adyen Suite, Mollie Suite, Nets Easy Suite, Nuvei Suite, Stripe Suite, Svea Suite, Zaver Suite, as well as standalone methods such as Klarna, Swish, PayPal, Worldline, and Manual Payment Methods for offline processes).
- Click the + icon next to the payment method you want to add.
- On the setup screen, fill in:
- Credentials: by default, new configurations use Briqpay's shared test credentials in test mode. Tick "I want to use my own test credentials" if you have your own test account with the provider and want to enter its API keys/credentials. When you go live, you will be asked for your live credentials in the same way.
- Payment Fields: method specific fields appear here. For example, Manual Invoice lets you set an invoice label, an alternate email address for the invoice, and whether an invoice delivery method should be enabled.
- Settings > Automatic capture: choose whether orders paid with this method should be captured automatically, or left for you to capture manually from the order view.
- Configured for countries: choose whether this configuration should apply to every country not separately configured, or only to specific countries.
- Click Create to save. A confirmation dialog may ask if you want to copy settings from an existing country configuration of the same method; choose Copy settings to reuse an existing setup, or No thanks to start fresh.
- The method now appears under Configured payment methods at the top of the page. Click the gear icon next to it at any time to edit its credentials or settings, or the trash icon to remove it.
Repeat this for every payment method you want to offer.
General vs. country configuration
Use Country Configuration when a payment method needs different credentials or settings in a specific market, for example a different PSP merchant account per country, or a method that is only relevant in one market. Anything not configured at the country level automatically falls back to your General Configuration.
Step 2: Decide what customers see
- Go to Payment methods > Display.
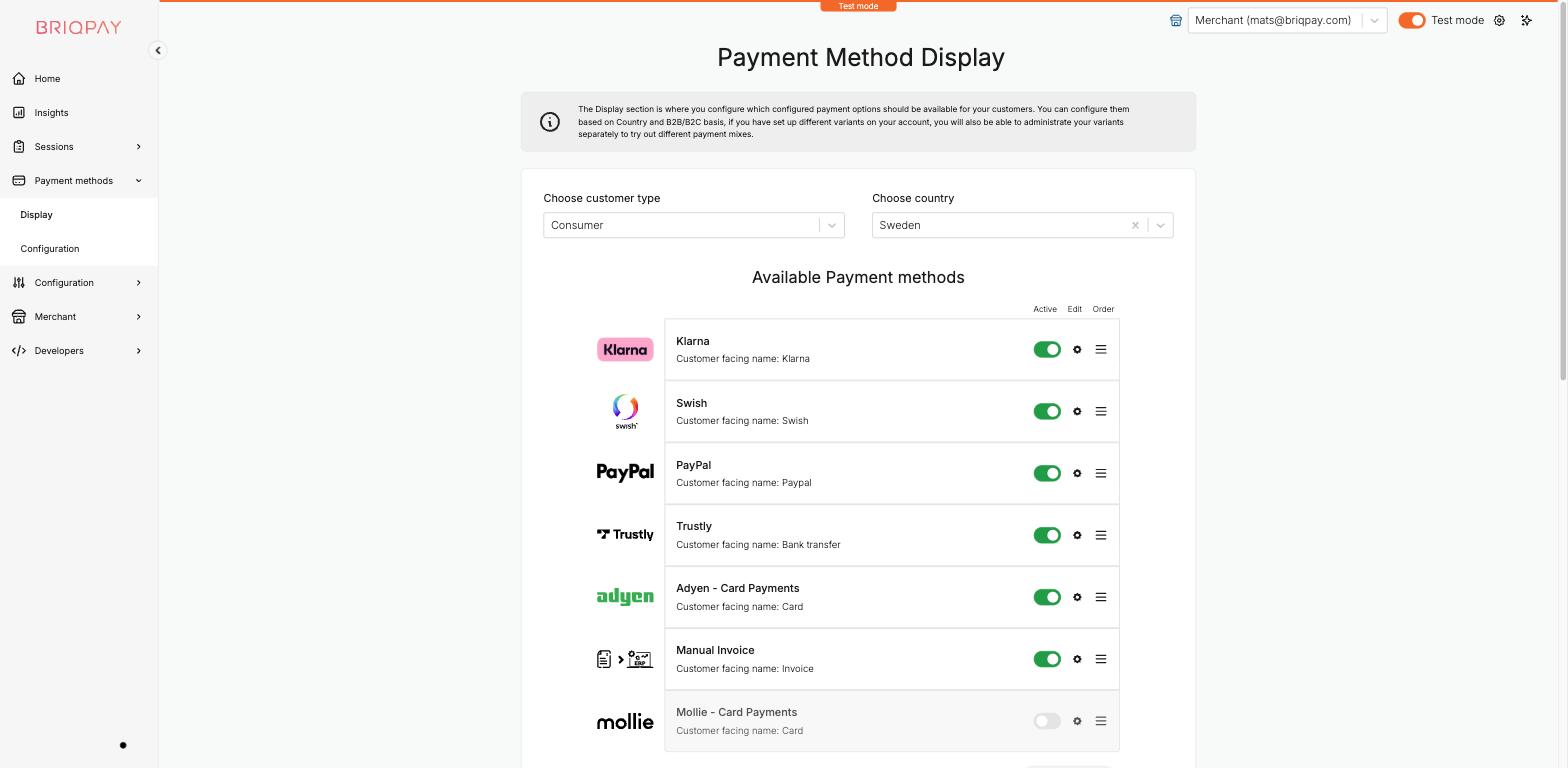
- Choose the Customer type (Consumer or Business) and the Country you want to configure. Payment method visibility can be set up differently for each combination.
- You will see every payment method you configured in step 1, listed under Available Payment methods, each with three controls:
- Active: the toggle switch turns the method on or off for this customer type and country.
- Edit (gear icon): opens Design settings and Rule settings for that method.
- Order (drag handle icon): lets you drag and drop to change the order methods appear in at checkout.
- Click Save changes once you are happy with your selection.
- Use Preview current settings at the bottom of the page to see a simplified list of what will be shown to the customer.
Design settings
Open the gear icon on a payment method to customize:
- Customer facing name: the name shown to the customer for this payment method, with the option to add per-language translations.
- Customer facing tag line: an optional short line of text shown under the method name, also translatable.
- Card Brands (for card payment methods): choose which card scheme logos (Visa, Mastercard, American Express, Discover, Diners Club, JCB, UnionPay) are displayed. This is a visual setting only, so make sure your provider actually accepts any brand you enable here.
Rule settings
Also under the gear icon, Rule settings let you control when a payment method is offered:
- Order value threshold: set a minimum and/or maximum order amount (including VAT) for the method to be shown.
- Require that the billing country is the same as the session country: hide the method if the customer's billing address is in a different country than the checkout session's country.
Advanced rules based on credit data or basic customer data are also listed here; configuring these currently requires Briqpay's help, so contact your Briqpay contact if you need conditional rules beyond order value and country.
Testing your configuration
Because Configuration and Display are both test-mode aware, you can build your full payment method setup in test mode, check the result on the Configuration > Preview page (see the "Checkout and signup configuration" guide) or with a test checkout session, and only switch to live credentials once you are satisfied.
Adding new selling countries
If you want to sell in a country that is not yet enabled on your account, add it first under Merchant > Settings > Selling Countries, then come back to Payment methods to configure and display methods for it. See the "Team, roles and account settings" guide for details.